
I’d been curious about finding a food safe epoxy for a sort of “Kintsugi” project for some time now. After I broke some plates, I decided I’d finally try it. I found this tutorial on YouTube which also recommends a food safe epoxy to try, and I thought it was really good:
However, I made two changes to this method:
One, I guess because it is winter, the resin was not nearly tacky enough to hold together the ceramic any earlier than 2 hours, so I increased the wait time.
Two, I bought some 24k gold dust for the final dusting, instead of using food coloring. I think it really makes an incredible difference. And 24k gold is food safe, and and 5 grams of it cost the same as 5 grams of the food coloring dust he recommended, so I didn’t really see any reason not to use it? I guess if you want to microwave it, but honestly the look of the real gold is so superior that I’m willing to sacrifice microwavability.
I will also add that, adding coloring to the binding resin seemed useless, as the final coat painted on top is totally opaque? I did that anyway, but couldn’t figure out why it was suggested. It seemed like it just made cleanup the next day more difficult and everything more messy in general.
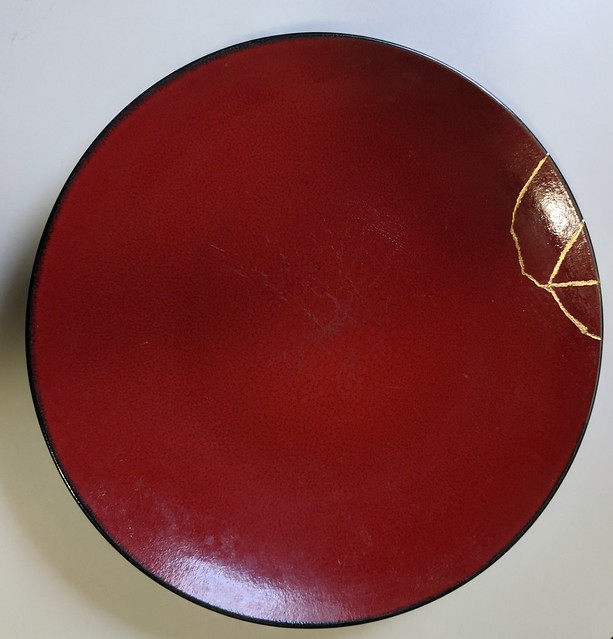
Here are the resulting plates:

While I was practicing on the plates, I accidentally dropped my work mug (whilst at work).
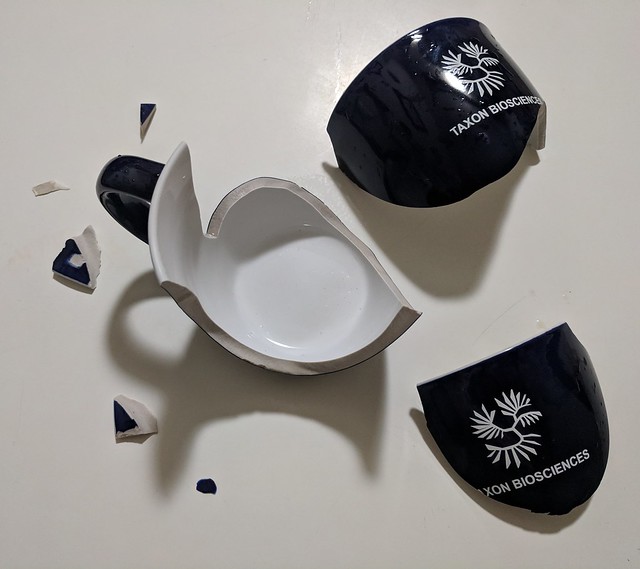
I was scooping up all the shards and throwing them away, when I realized that maybe it would be a good project to try “kintsugi-ing” that mug as well. My employer had recently been acquired by a larger company, and they are now closing our site. I had thought that I’d keep the mug as a souvenir of all the trials and tribulations, and since the idea of wabi-sabi is that a thing is more beautiful for the life it has lived and its wear and breaks are a part of its history and aesthetic, I thought that was a healthy attitude to apply to this situation. So, yeah, it is a cheap corporate mug, but the process in this case was largely a symbolic one.
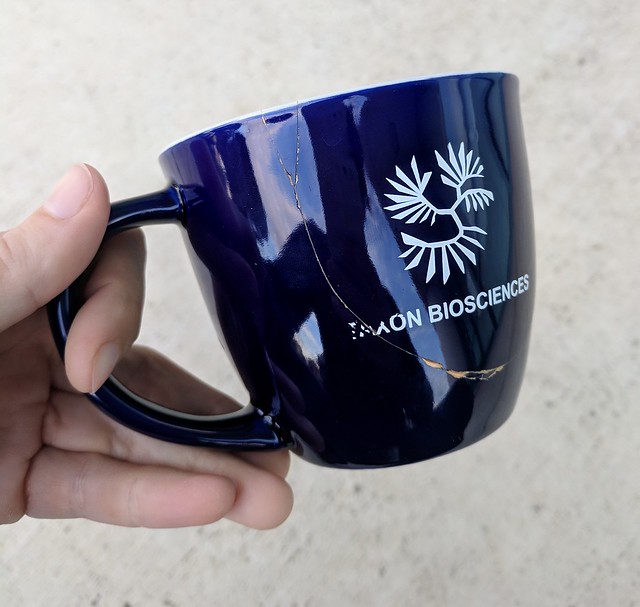
Here are some photos after the initial join, before the final gold step on top:
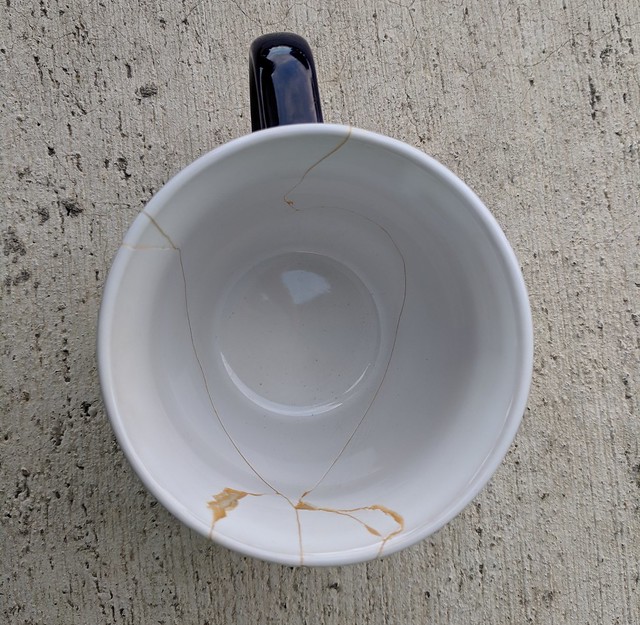

And here are some photos of the mug after it is all done, and I painted on the final part on top and dusted 24k gold dust onto the fresh resin:
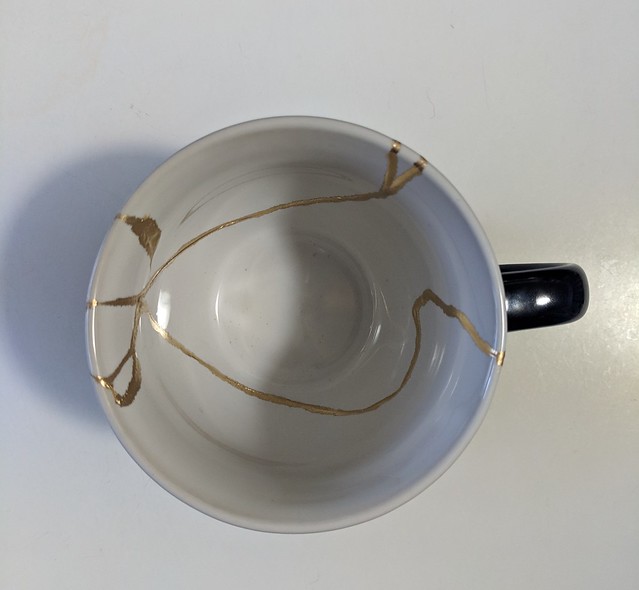

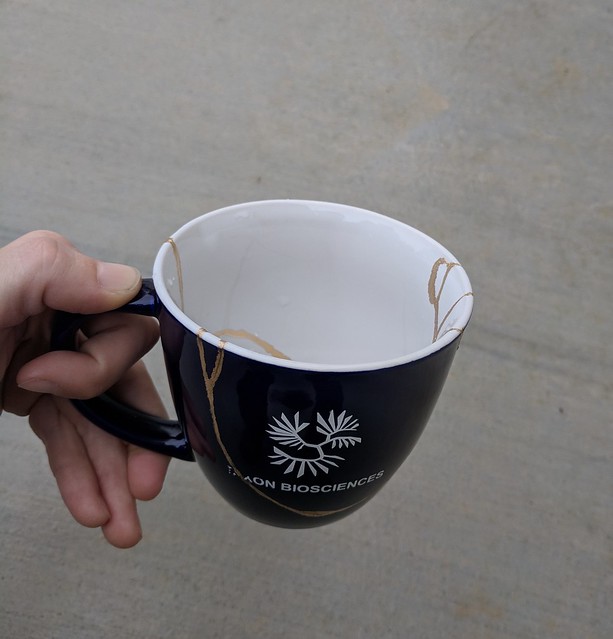
Tah-daaah!
Prior to the the final gold dusting step did you apply another coat of the resin on top of the joined cracks? or was a separate adhesive used? Thats one part of the video that I’m not clear about. I took a class in Japan where we used a play-doh like resin for joining the pieces but then after trimming we lacquered over the cracks then dusted them while still wet with the gold dust.
Yes you are correct, I let the joining resin fully cure, and then used a thin paintbrush to paint on top of the joined cracks with more wet resin, and dusted it whilst that was still wet.
This is great! Where did you purchase the pure, 24k gold dust from? That seems like an excellent approach, just not sure where to source the actual gold dust.
I was just watching the same video, planning on attempting it in the next week or two, so very glad to hear it worked out for you! Have you been drinking hot liquids out of the mug? I know that the ArtResin (what’s used in the video) website warns against heating it over 120F [https://www.artresin.com/blogs/artresin/artresin-passes-food-safety-tests], but I’ll just avoid eating hot foods out of the bowl I’m planning to fix.
Thanks for doing the write-up!
I got it from a cake decorators supplier! 24k gold is non-toxic and is often used in cake decoration, so 24k gold leaf and 24k gold dust is often available from cooking supply stores and whatnot. Good luck!
I have not tried drinking hot liquids from my mug yet, I’ve only been using it for ice coffee and other cold liquids. I’m too scared to try! But the plates and bowls and mug I show here are still in regular circulation for eating off of in this household, and have held up!
What other tools did you use ie brushes etc.? I’m making up my diy kit and want to make sure I have everything for this project. Thank you.
I did buy some cheap fine-tipped paint brushes specifically for this project, because after painting with the resin they were basically ruined once it cured. I also used toothpicks to help with some of the application, as I recall. I think that is everything, though. Good luck with your project!!
Hi happy to stumble upon your project after finding the original video on Youtube. I tried to repair a piece today with the epoxy after 45 min and again at 2 hours with no luck. I am curious how long you held the pieces together to get the epoxy to hold. I am using the same product. Thanks.
Good question! I think that it actually cures faster when it is warmer, and as I recall it was fairly warm when I did it. I do remember assembling the pieces in such a way that they tended to hold together by their own weight, but I also remember sometimes using blocks (etc) if necessary to prop them up and keep the pieces pressed together. Because really it’s not a full cure until after 24 hours, and it stays pretty mushy until then.
How do you dust for the last step without smudging the resin line? I tried on a test piece as the video demonstrates and my lines looked awful.
I dipped a dry paintbrush in gold dust, and the held it over the resin line, and lightly shook/tapped the paintbrush so the dust fell delicately off the brush and onto the resin, without ever touching it. I repeated this until it was suitably covered. I waited until it was completely cured (~24 hours) before cleaning/wiping away the excess.