Furry Little Coat of Mold

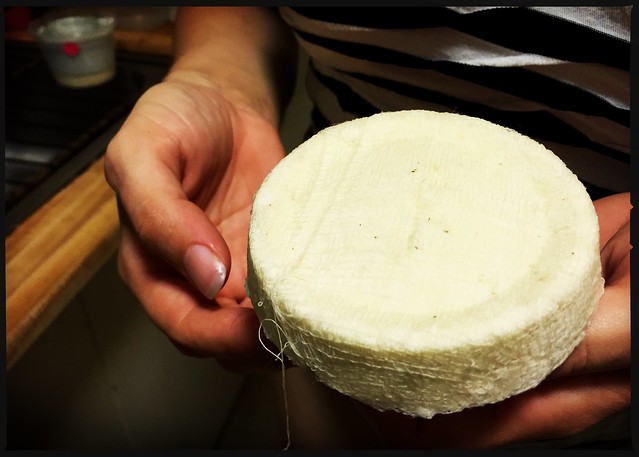
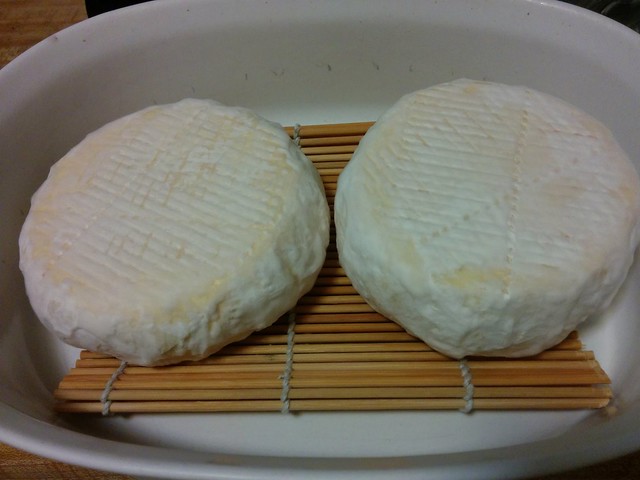
Our homemade brie is successfully growing its furry little coat of mold! And just look at how different they look compared to when I first took the curds out of the forms!

Our homemade brie is successfully growing its furry little coat of mold
Furry Cheese

They’ve really flattened out. I didn’t even notice this until I looked back at that old post!

Trying our hand at brie now
When I first turned the curds out of the forms… they were so much taller and fatter back then!

However, I did hit a bit of a snag, which I think I should warn everybody about. I was following instructions from a zine that said, “when you see mold, wrap it in cheese paper” so I did just that. The zine then went on to describe all the terrible horrors that await the person who waits too long to wrap their cheese (and showed photos of drying mats tearing the mold off of the surface of the cheese, thereby ruining it). Nowhere did it mention it would be a problem to wrap the cheese too early.

Turns out this was slightly misleading. I interpreted this to mean, “wrap the cheese as soon as you see even a microscopic hint of mold,” when actually what they meant was “once the cheese is completely covered with a thick blanket of mold.” The problem with covering the cheese with cheese paper as early as I did is that the moisture sitting on the cheese where the paper is touching it will actually inhibit the mold growth (which is ironic, as mold will also fail to form if there’s not enough moisture).

Luckily, I was so excited to see how the mold was coming along that I unwrapped it to take a peek and noticed that the sides were covered with a luxurious coat, whilst the tops and bottoms were patchy-to-completely-bare. Concerned, I looked up a second opinion on brie making, and saw that the consensus was to wait until your brie is completely covered before wrapping it. Whoops! So I unwrapped them and returned them to the casserole dish that had previously been their mold-making home. There, I hoped they would still form the mold all over, as if I hadn’t ever wrapped them in paper.

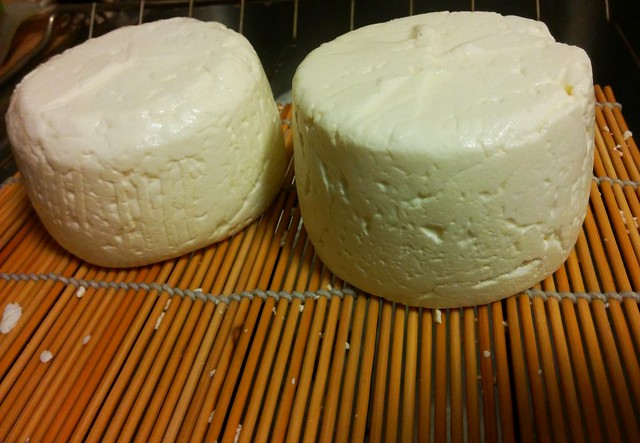
Luckily, it would appear that they have quickly recovered from this error, as you can see in the photo above (taken about a week after discovering my error). I don’t know what this means for the aging time, to be honest. I suppose I’ll have to feel it out. By the original estimates, they should be ready next week at the earliest, but they are supposed to age for ~4 weeks after getting wrapped so I think this moves things back a bit.

So let this be a warning to all you would-be cheesemongers out there: wait until your brie is completely covered in mold before you wrap it in cheese paper, or meet the same fate! No matter what your zines say.

Mold-Ripened Cheese

Today, after the successes I’ve had with cheddar etc, I’ve decided to try my hand at mold-ripened cheese. This was inspired by reading that, if you don’t want to buy the Penicillium candidum, you can just use a piece of some other mold-ripened cheese (like brie or Camembert) to inoculate the new cheese. I thought that sounded easy, so I went ahead and tried it.

Trying our hand at brie now

So far, so good. Let us see how the mold grows!

Farmhouse Cheddar

Today, since Doc and I had already taken that cheese making class, I decided to make some farmhouse cheddar today!

Since we are still experimenting with all the factors, Doc and I decided to make four little cheeses instead of one big cheese:

  1. Pasteurized milk, aged 4 months
  2. Pasteurized milk, aged 8 months
  3. Raw milk, aged 4 months
  4. Raw milk, aged 8 months
Cheese making
Stirring the curds in a warm water bath (aka my sink). The pot on the right has the raw milk, the pot on the left has the pasteurized milk.

These were the only variables, though. All cheese permutations were made from non-homogenized Jersey cow’s milk. I’m hoping that the pasteurized milk cheese tastes just as good as the raw milk cheese, because raw milk is incredibly expensive (makes sense why it would be, having a much shorter shelf life, but still).

Cheese making
Breaking up the curds into little pieces and salting them, after the first draining step.

I could really tell the difference between the two milks, though. You need to add calcium chloride to pasteurized milk in order to use it for cheese, otherwise it won’t form a firm enough curd. So there’s that. But the pasteurized milk whey was a very bright brilliant yellow, whereas the raw milk curd was a much duller yellow, almost a greyish yellow in comparison. I do not know why this would be. You can see the color difference in the photos, but it seemed even more dramatic in person.

Cheese making
One of the cheeses after the first pressing.

When they’re done aging, we’ll taste them in side-by-side comparisons and decide if the raw milk is worth the extra cost. I wanted to age one of the test cheeses for over a year, but Doc suggested that since these are just tiny test cheeses, we should do a shorter aging process so we can start on the large-batch cheeses (to age over a year) sooner.

Cheese making
We made improvised cheese molds by cutting slits into old salsa containers for the whey to drain through while they got pressed.

The bacteria we used were lactococcus lactis subsp. lactis and lactococcus lactis subsp. cremoris. I’ve read that Streptococcus thermophilus is being used more and more in industrial cheddar production, but it wasn’t present in the little culture packet we bought.

We’ll see how it turns out!